
 |
| "Only those who will risk going too far can possibly find out how far they can go." -- T.S. Eliot |
I intended to stay home until my foray to South Korea in September to conserve money and energy. But I just can't say no to an opportunity for a great adventure simply because I know how bad it feels to be filled with excitement and later on be turned down by your friends when all is set, so I halfheartedly agreed to do a day hike in Pico de Loro. Thank goodness I agreed because on the eve of the climb, life gave me a blunt dose of reality and left my pride and heart broken so I am in dire need of an adrenalin rush to revive shattered self.
Getting There
From Baclaran, ride the buses bound to Ternate, Cavite. Fare is Php83.00. Alight at the bus terminal then ride a tricycle for Php 100 per person that will take you to the DENR (Department of Environment and Natural Resources, in case you already forgot =P) office. In DENR, you will be asked to pay Php 20 for registration. From there, the jump off point is just a 5-minute-walk along the road.
Getting to the jump off point of Pico de Loro coming from Manila is easy but traffic in different towns such as General Trias and Naic will make the travel time longer. When going on a day hike, it is advisable to be in Baclaran at 5AM. We left Baclaran at 6AM and arrived at the jump off point at 8:30AM, quite late than what we expected.
NOTE: This was before the Manila Bus Ban was implemented.
The Trail
This is my second mountain (first climb) and my friend's third, needless to say that we are both beginners. It is both our first time to climb this mountain but the online reviews of Pico de Loro saying that it is impossible to get lost there gave us confidence.
We were thrilled to see that even near the jump off, the trail is already forest-ish. This trail is definitely way more challenging and tiring than Mt. Maculot. On a beginner's point of view, the trail is not marked as well as that of Maculot or maybe it is just us. It took us 4 hours to get to the summit and another 30 minutes to get to the monolith a.k.a. Parrot's Peak.
NOTE: Along the trail where there is a stream and a mini waterfall, you will pass by a fence which at first you will think is the wrong way because there is a confusing orange arrow pointing to the left that will get you to follow the waterway. We got a bit lost at this part only to find out that we should go through the fence. Do not go downstream, climb up to the fence and pass through it!
 |
| The first Pico de Loro sign we saw on the trail |
 |
| Base Camp where you will be required to pay Php 20 |
 |
| Alibangbang Station |
 |
| The Trail |


On The Way to the Summit
It was cloudy when we reached the campsite so the view is not at its best but being a person who dreams of flying, being near the clouds gave me excitement.
 |
| View of the summit and the Parrot's Peak from the campsite |
 |
| With the famous guide dog of Pico de Loro |
 |
| On the way to the cloudy summit |

Pico de Loro Summit
Most of the people that had been to Pico de Loro said that the most challenging part of the climb is the Parrot's Peak, but for me, it is the summit. There is nothing to hold on to but grass. My friend is already on the summit while I was trying to assault the trail of loose rocks and soil on my own. I almost gave up but being the competitive person that I am, thinking I could do whatever it is that a man could do (hehe), I didn't shout for help and I did my best to reach the top. And I am glad I did not ask for assistance because the satisfaction I got upon reaching the summit is priceless.. :)
It was still cloudy when we reached the summit. There will be a few seconds of clearing which allowed us to take a glimpse of the monolith and the coast line but just when we are aiming our cameras at the view, the clouds will take over again.
 |
| At the summit with muddy hands due to "four wheel driving" :) |
 |
| Paulakwatsera in the Clouds |
 |
| View of the Parrot's Peak from the Summit |

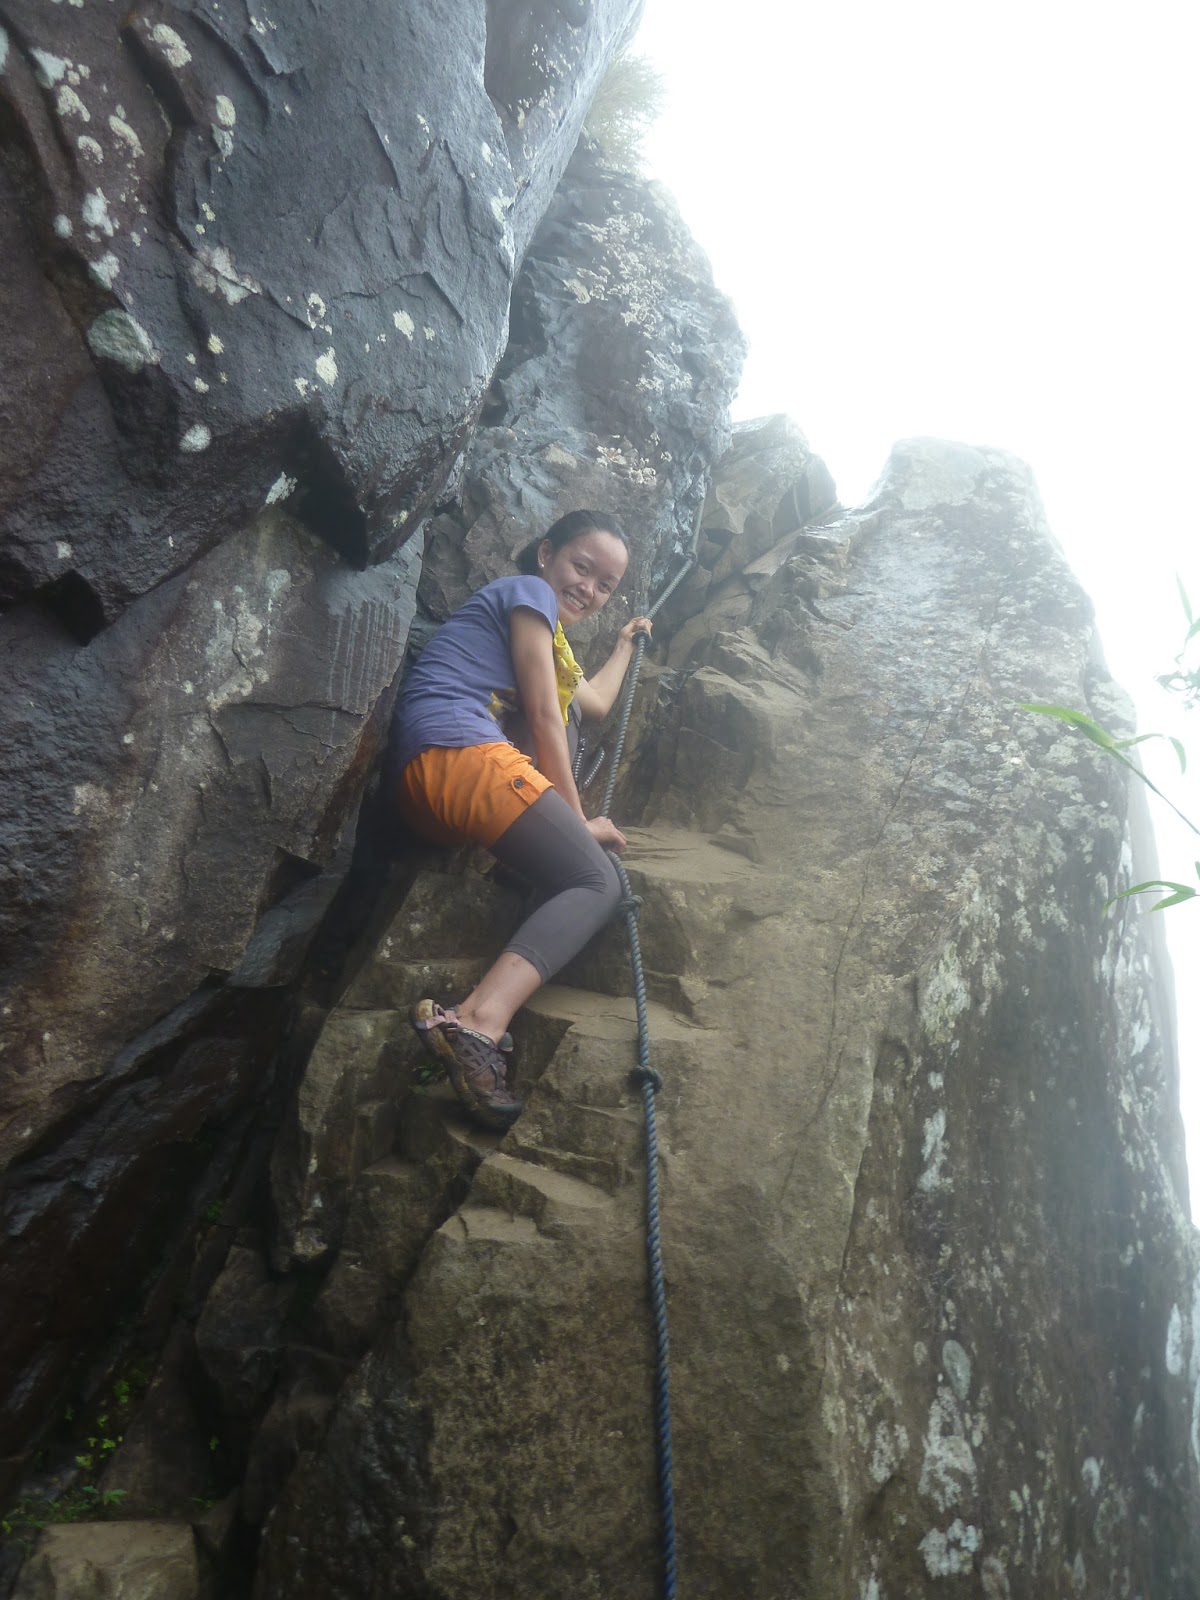
The Parrot's Peak
If I haven't mentioned it often enough, it was cloudy and the rocks at the Parrot's Peak are wet which made our ascent tricky. It helped though because the clouds hid the view of the cliff and made me a little bit at ease.
 |
| The Parrot's Peak |


 | |||
| Surprisingly, I find this part quite easy. (Yabang! hehe) |

Upon reaching the top of the monolith, the view is still obstructed by the clouds. I felt a little upset because I expected a breathtaking view to cap off the tiring climb. After promising ourselves that we will go back to this peak again on a better sunny day, we decided to start our descent. But just when all hope is lost, nature bestowed it's mercy upon us and blessed us with its spectacular beauty.


And here is a video to further appreciate the view from Parrot's Peak:
The Pico de Loro Series:
Dayhike Haywire: Mt. Palay-Palay/Pico de Loro The Ascent
Dayhike Haywire: Mt. Palay-Palay/Pico de Loro The Descent
Dayhike Haywire: I Shouldn't Be Alive Experience
Wow. Hanep. Salamat ng sobra. I enjoyed reading this page. Especially the pictures taken at the summit. Just wow. I want to feel what you have felt upon reaching the top.
ReplyDeleteHeya Leigh, Go ahead and climb :) It is an experience for the books :)
DeleteThank you for your very detailed blog it's a big help. I'm going on solo but i'm still hoping someone will join me to go there this weekend :)
ReplyDeleteTake care and have fun! :)
DeleteHello Paula :) I sent an email to you..hope you can give us guidance. We plan to visit there tomorrow :)
ReplyDeleteI so love the photos!
Hi Fritz, sent ya a response. Hope that will somehow help. Take care and have fun! :)
Deletehi paula. ive been in pico de loro but i just cant remember the trails. Do you have trail map of pico de loro? thanks.
ReplyDelete